The Ultimate Guide to the Best 3D Design Apps for iPad: Shaper 3D vs. Nomad Sculpt
Discover the power of 3D design on your iPad! Whether you're an aspiring designer or a seasoned creator, these apps deliver robust features and intuitive touch controls, all optimized for use with your Apple Pencil. In this guide, we'll dive into two standout apps—Shaper 3D and Nomad Sculpt—and share why they could be the perfect additions to your creative toolkit.
Why Choose 3D Design Apps for iPad?
The iPad isn’t just a tablet; it’s a powerful device that can transform the way you create. With its touch screen and Apple Pencil support, the iPad offers a unique, tactile experience that many traditional desktop tools simply can’t match. Here’s what makes 3D design on the iPad so appealing:
Intuitive Touch Controls: Navigate and manipulate your designs using simple gestures.
Apple Pencil Integration: Enjoy precision and pressure sensitivity that brings your digital sketches to life.
Portability: Create anytime, anywhere—no need for bulky desktop setups.
Affordability: Many high-quality apps are available at a fraction of the cost of professional software.
My Design Goals
Before exploring the apps, I set a few personal goals:
Desktop-Quality Power: I wanted an app that could mimic the capabilities of desktop tools like ZBrush or Fusion 360.
Native iPad Experience: It was crucial to use an app specifically designed for the iPad, one that fully supports touch gestures and the Apple Pencil.
3D Printing Capability: Every design needed to be exportable as an STL or OBJ file, ensuring I could take my digital creations into the real world through 3D printing.
Shaper 3D: Precision Meets Portability
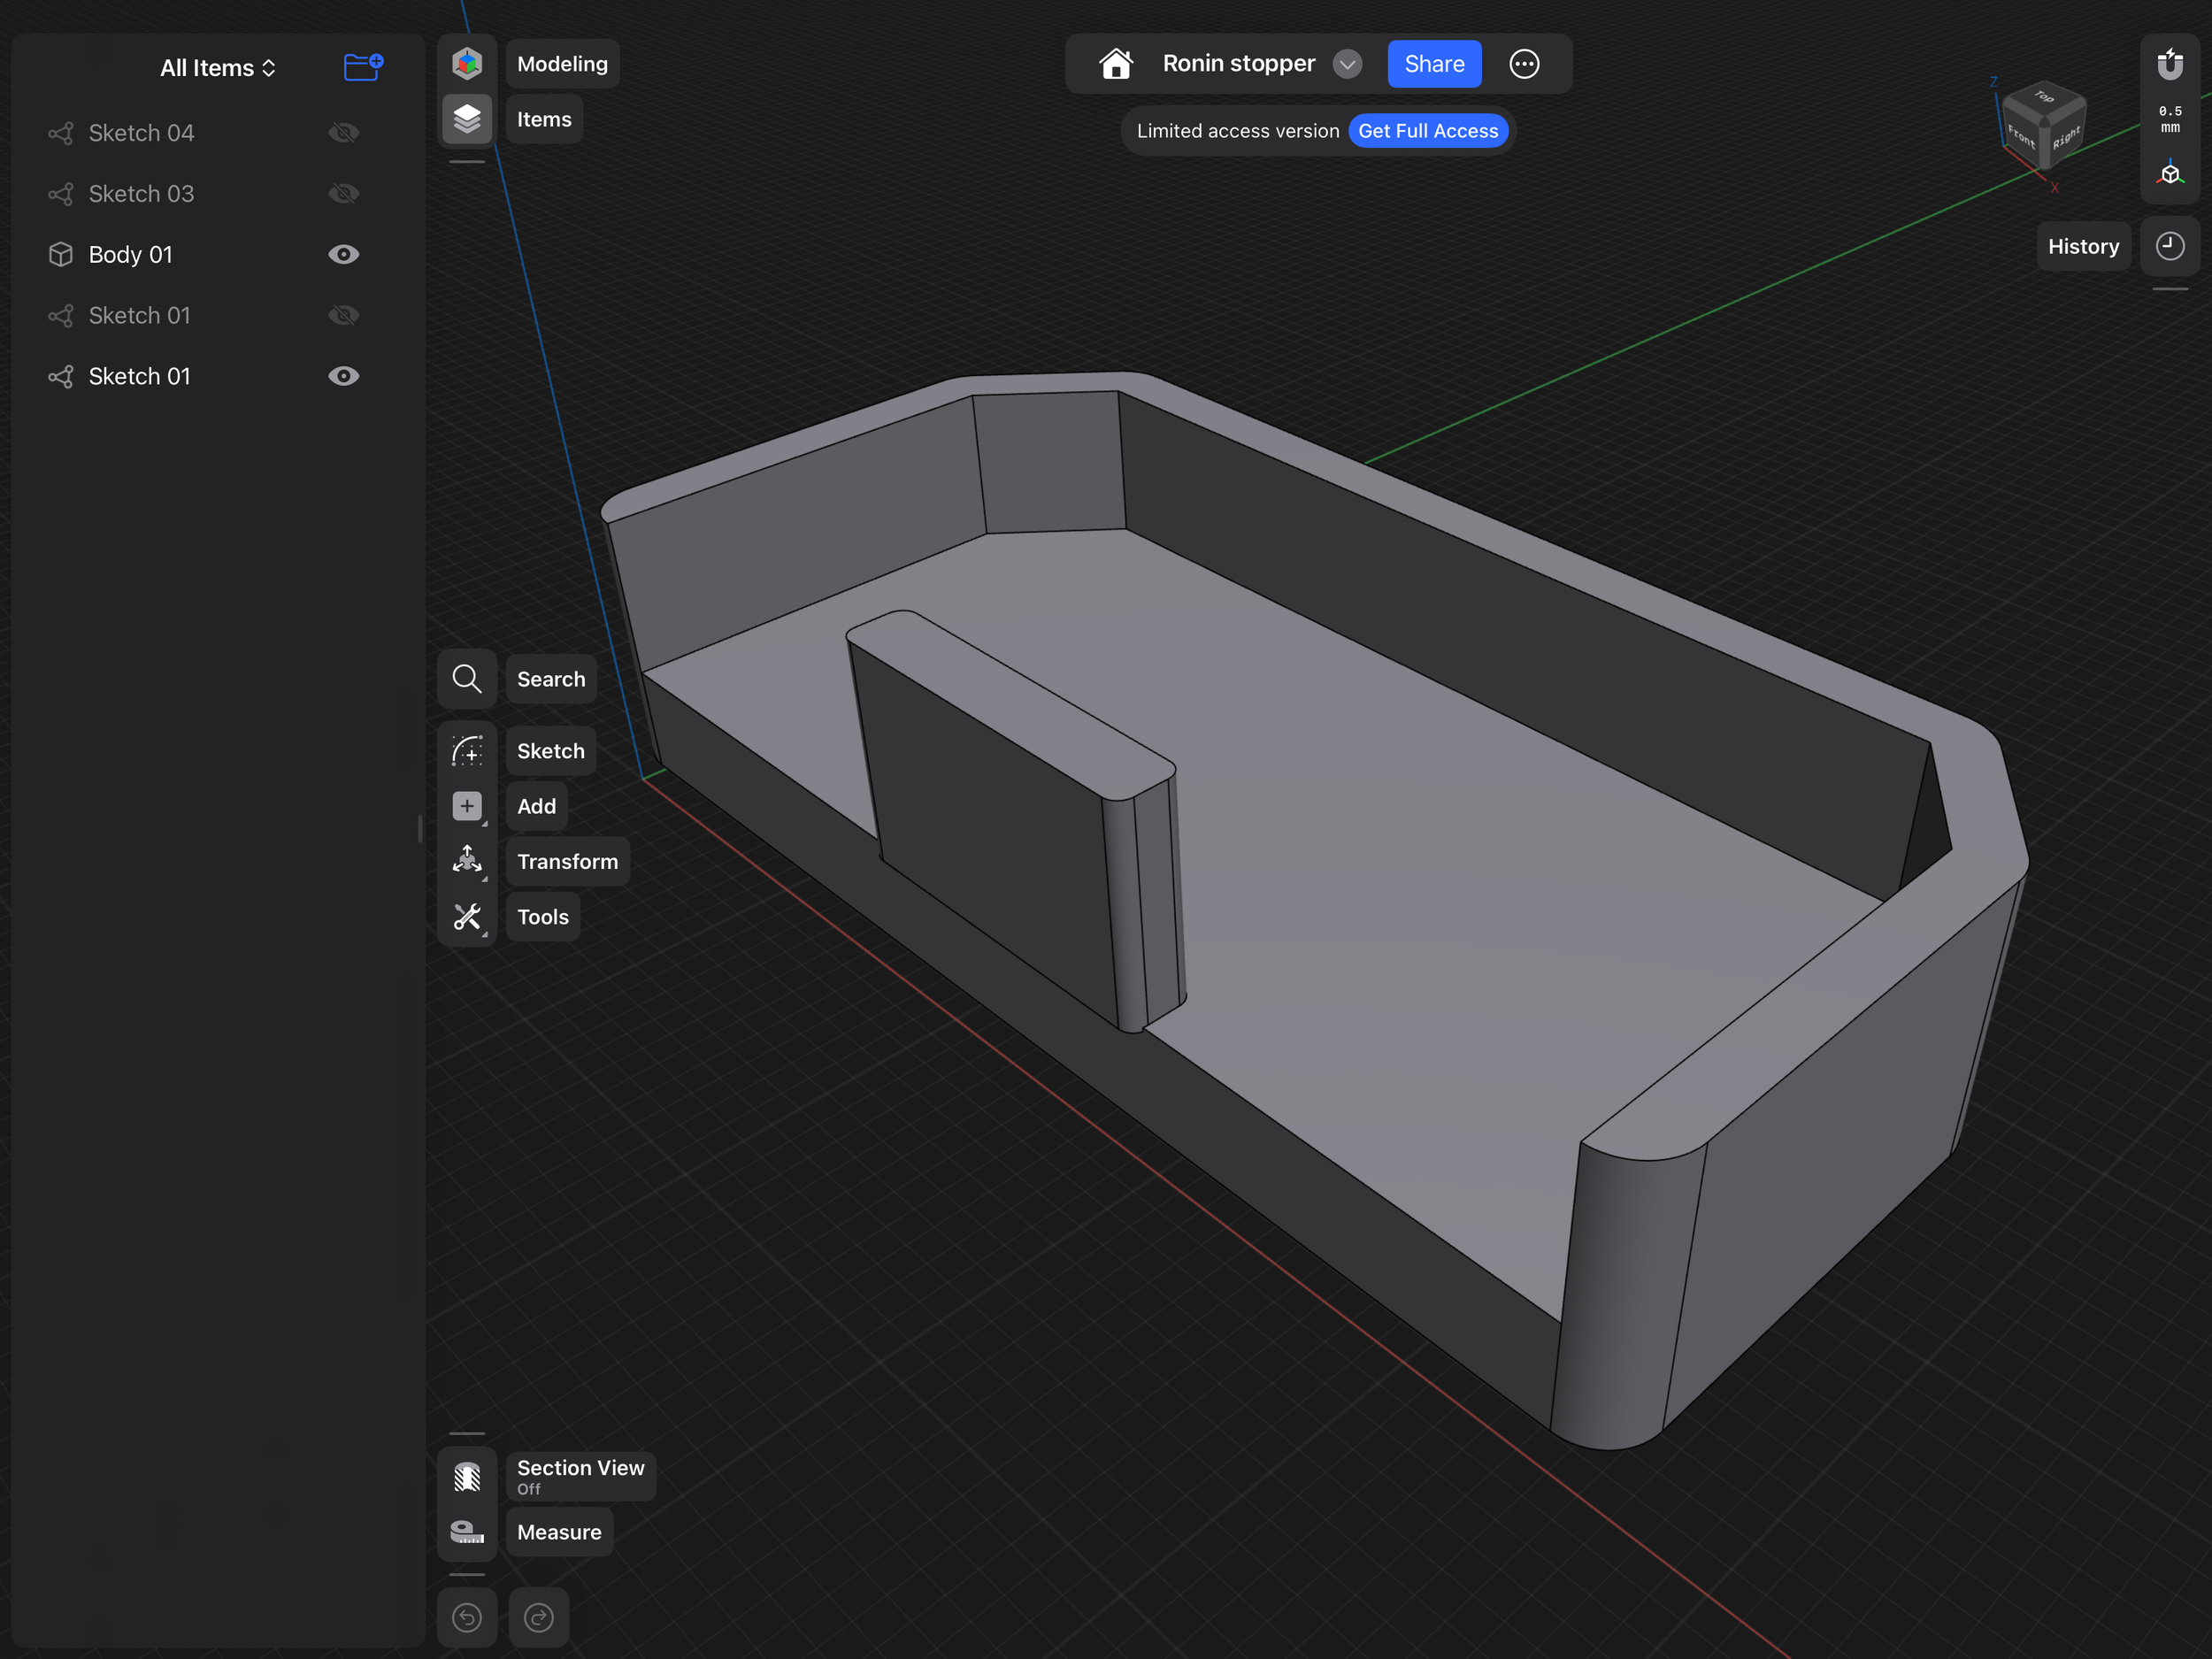
Screenshot of the Shaper 3D interface
Key Features:
Fusion 360 on a Tablet: Shaper 3D brings a near-desktop level of CAD functionality to your iPad with intuitive touch controls.
Robust Community Support: The app boasts a large community and regular video tutorials across Instagram, Twitter, and YouTube, making it easy to find help and inspiration.
Regular Updates: With frequent improvements and new features, Shaper 3D remains on the cutting edge of 3D design technology.
Free Core Features: Download and use the app for free, with an option to subscribe (around $25/month) for high-resolution exports and additional features. The free version limits you to two designs at a time.
Real-World Application:
I personally used Shaper 3D to design a replacement part for my Ronin DJI Gimbal. Its user-friendly interface and robust features make it an excellent choice for technical CAD projects on the go.
Nomad Sculpt: The Sculptor’s Playground
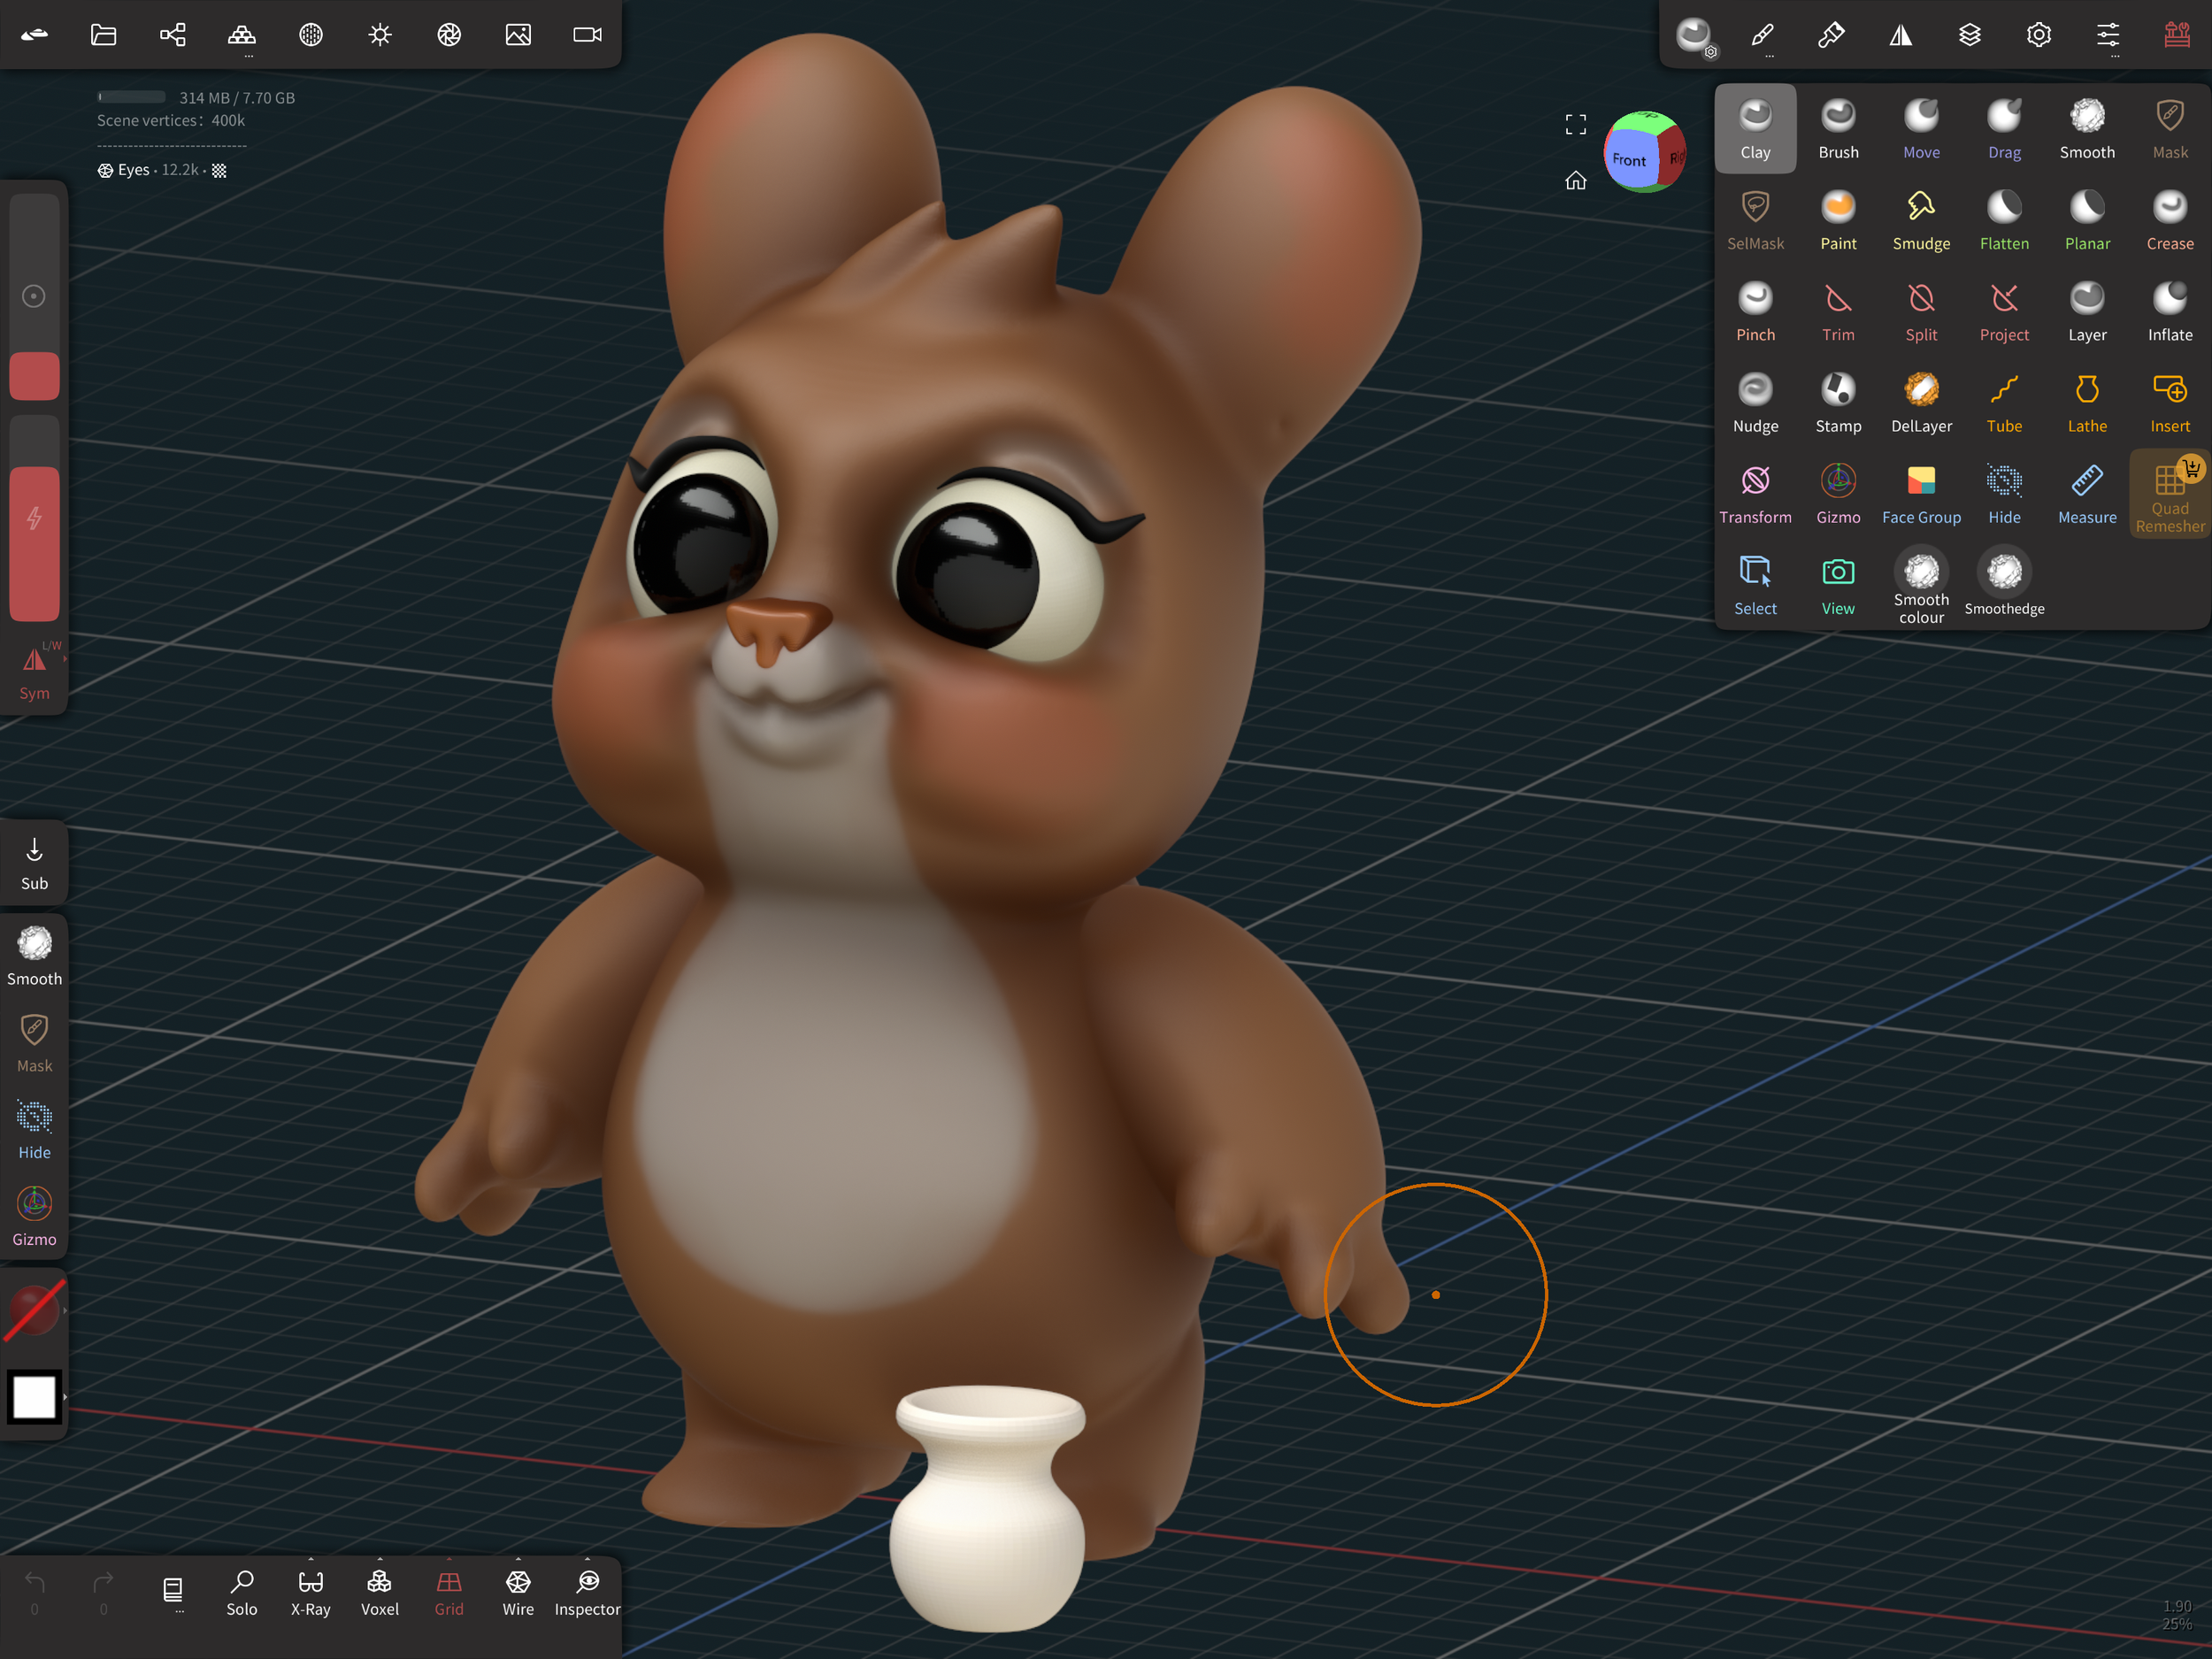
Screenshot of Nomad Sculpt Interface
Why You'll Love It:
Affordable Excellence: Priced at only $9.99, Nomad Sculpt offers incredible value for those interested in organic 3D modeling.
Feature-Packed: Beyond standard 3D modeling, the app supports layers, multiple object management, and file imports (OBJ files), giving you the flexibility to work on complex projects.
Customizable Tools: Adjust every brush to your preference and even explore in-app painting options. Create custom textured brushes for unique effects.
Dynamic Remeshing: Easily adjust polygon counts to enhance or simplify your design, ensuring your models have the perfect level of detail.
Proven Performance: I created an Oni Mask entirely in Nomad Sculpt, then successfully printed it on my Bambu Lab A1. The experience highlighted the app's robust capabilities and seamless integration with 3D printing workflows.
Designing My Own PlayStation Controller Stand
Now for the fun part! I put these two apps to the test by designing my very own PlayStation controller stand.
Step 1: Creating the Base in Shapr3D
I started in Shapr3D to get my initial structure just right. Since this app is CAD-based, I could easily set precise measurements for the stand.
Step 2: Refining the Model in Nomad Sculpt
Once I had the basic shape, I moved it into Nomad Sculpt to fix the geometry. Shapr3D’s free version exports at a lower resolution, so I used Nomad’s remeshing feature to add more detail and smooth out the model.
Step 3: Iterating and Adding a Nameplate
The first couple of prints looked decent, but something was missing. That’s when I decided to add a nameplate to the design!
After testing a few different versions, I reached Version 4, where I made the nameplate a separate piece. This allowed me to print it in a different color without needing an AMS (Automatic Material System) on my Bambu Lab 3D Printer.
Still, I wasn’t completely happy with it. The nameplate was attached using two small holes, which worked, but felt a bit flat. So, for Version 5, I adjusted the angle to 45 degrees for better visibility from the front. And that small tweak made a huge difference!
Final Thoughts
Both Shaper 3D and Nomad Sculpt provide unique strengths for 3D design on the iPad. While Shaper 3D excels in technical CAD and precision, Nomad Sculpt shines with its organic sculpting and customizable features. I’m not sponsored by either app—I purchased them myself and have been using them off and on for the past year to explore and expand my creative skills.
If you're ready to take your 3D design projects to the next level, check out the links below for more information and to download these fantastic apps. And if you're curious to see what’s possible, I’ve also included a link to the Oni Mask file I designed with Nomad Sculpt—feel free to print it yourself and join me on this creative journey!
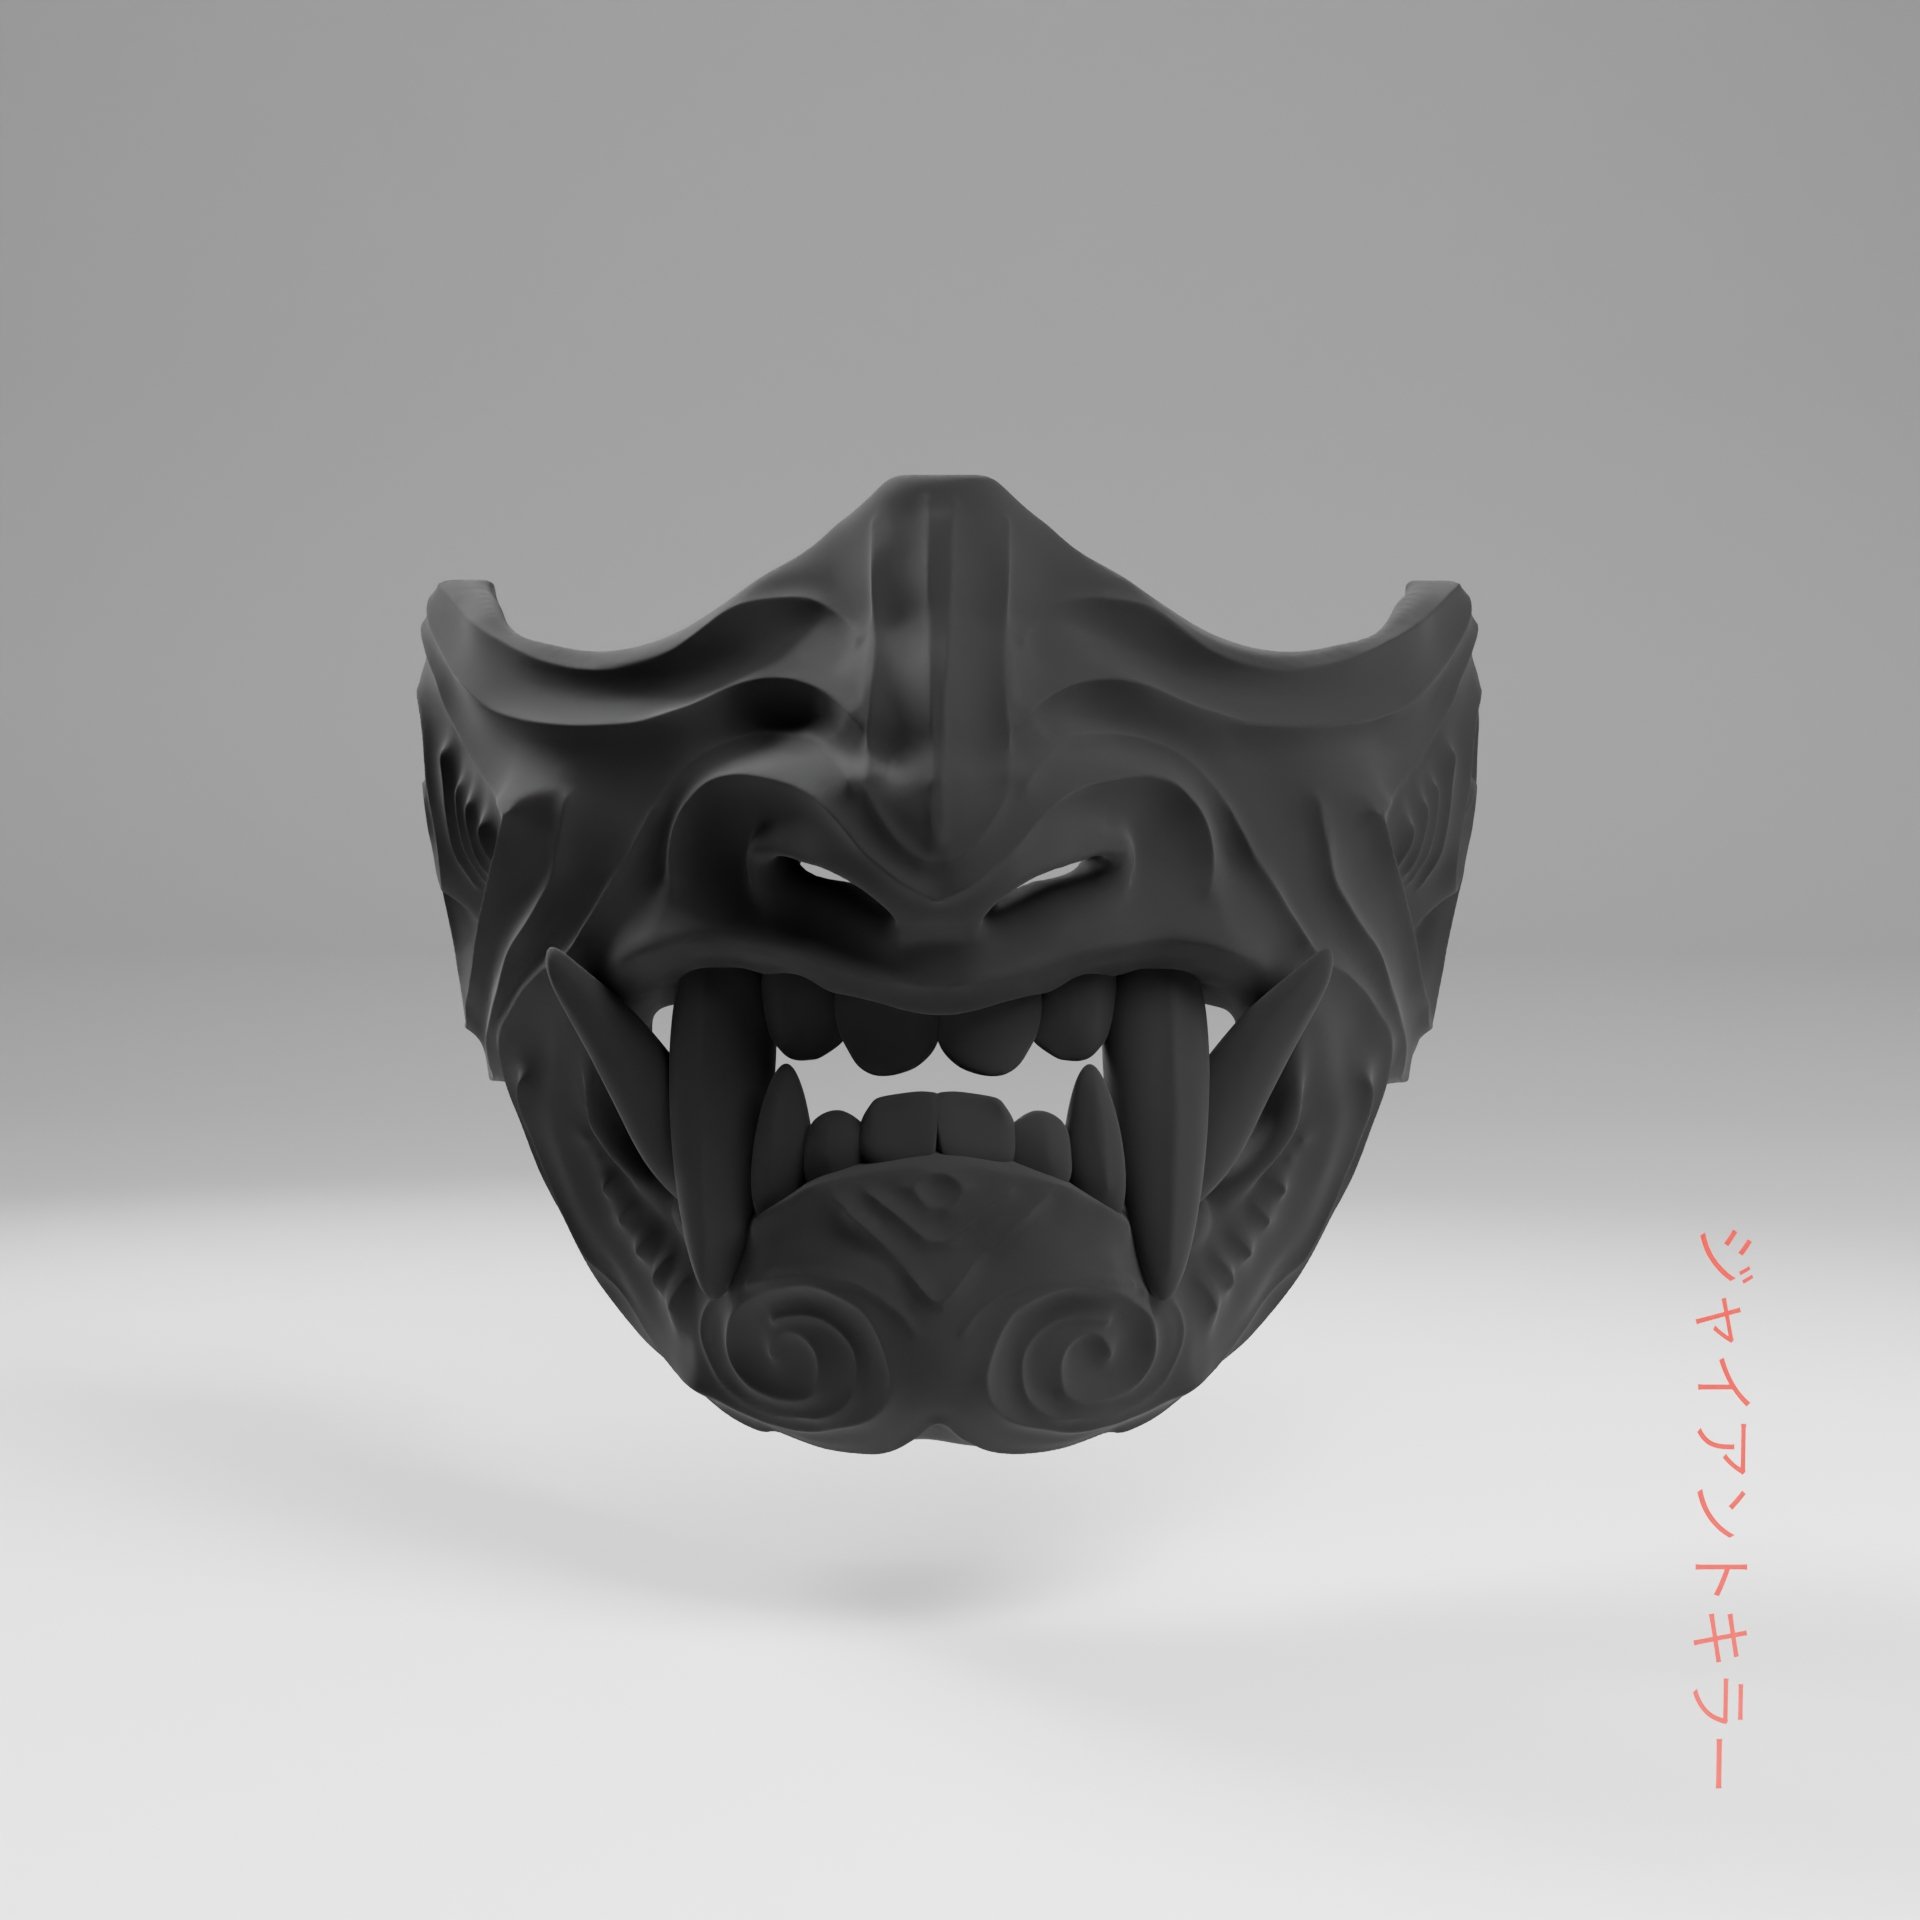
Created in Nomad Sculpt
Ready to transform your iPad into a 3D design powerhouse? Download Shaper 3D and Nomad Sculpt today and unleash your creativity!
LINKS TO THE GEAR I USE
MAKER STUFF: Bambu A1 Printer: https://amzn.to/418Yhi2
AIR PURIFIER: https://amzn.to/4g3xd88
Deburring Tool Kit: https://amzn.to/3ZXwvE4
Caliper:https://amzn.to/3ZZqlDO
Model Clippers: https://amzn.to/3Dijr3w
PLA Filament I use:
Elegoo: https://amzn.to/42p8HZS
DEEPLEE PLA Filament: https://amzn.to/3RGOc61
Keywords:
3D design apps for iPad, 3D modeling iPad, Apple Pencil 3D design, Shaper 3D review, Nomad Sculpt review, iPad CAD app, 3D printing iPad, best 3D design apps
Thank you for reading! If you enjoyed this guide, please share it and leave your thoughts in the comments below. Happy designing!